

Introduction
| Getting Started | Get Working | Using Planner and Other Apps |
Microsoft Planner is a task management software making it easy for your Team to create new plans, organize and assign tasks, share files, and chat about what you're working on to get updates.
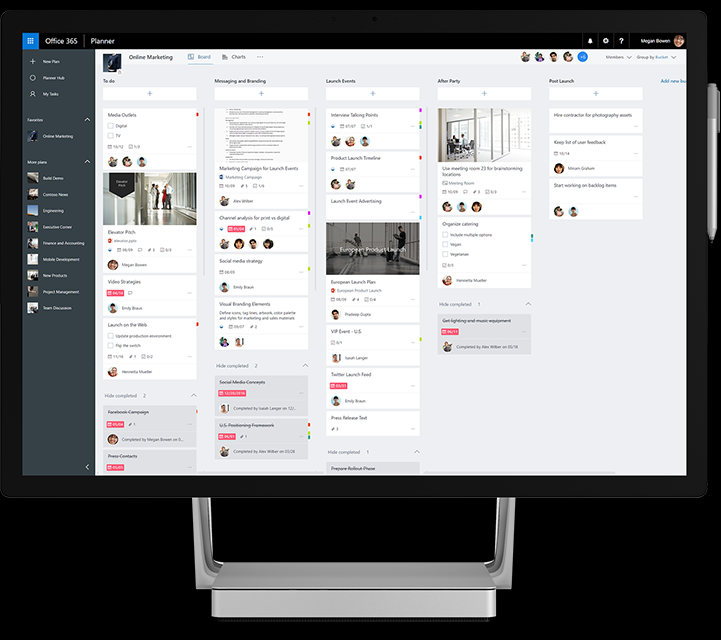
Each plan has its own board that lets you organize tasks into buckets and categorize tasks based on status or to whom they are assigned.
| 
|
| 
|
Use charts to know where plans stand and how much progress you've made to your goal. Receive email notifications whenever you're assigned a new task or added to a conversation.
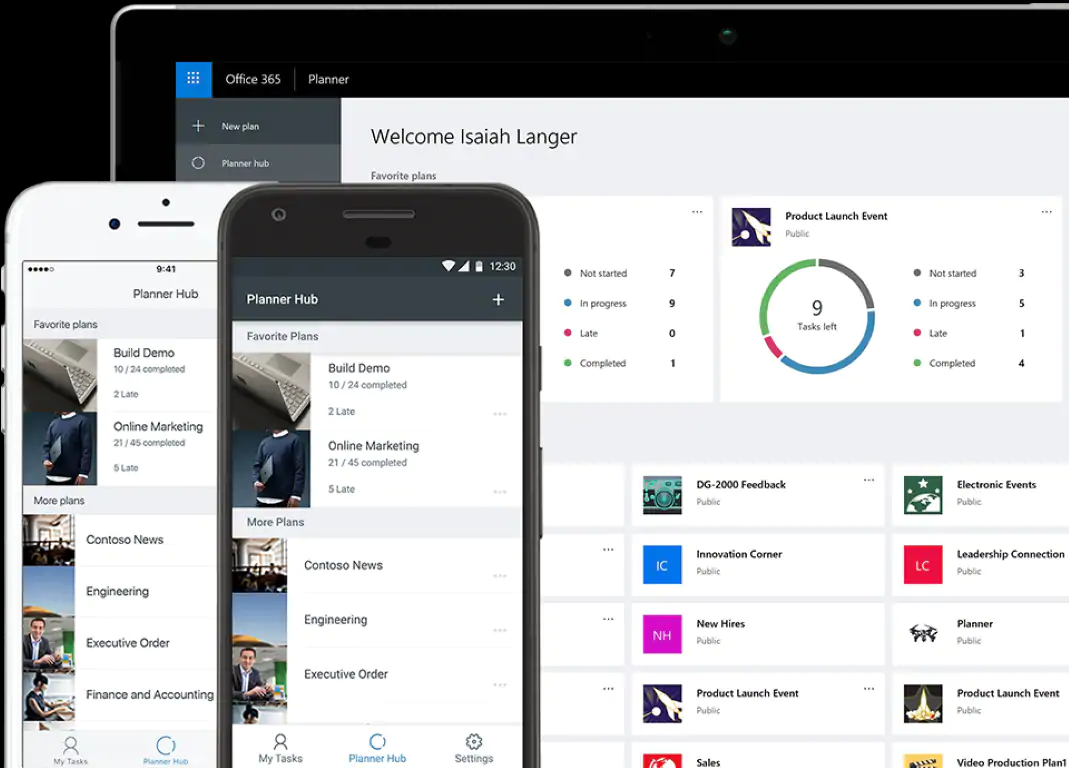
Microsoft Planner is currently available to anyone who is a member of a Microsoft Team. You can login at https://tasks.office.com.
Get Started
Create A Plan
Plans must be associated with an existing Microsoft Team. In order to have a Team created, please email microsoftteams@austin.utexas.edu with the desired name for your plan and the email address of its owner.
Organize your tasks by adding one or more Planner tabs to a team channel. You can then work on your plan from within Teams or in Planner for web, remove or delete your plan, and get notified in Teams when a task is assigned to you in Planner.
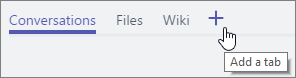
Open Microsoft Teams and the channel you want to add a Planner tab to Click Add a Tab + at the top
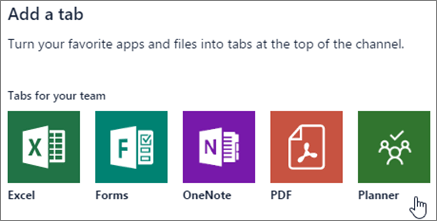
Select Planner from the list
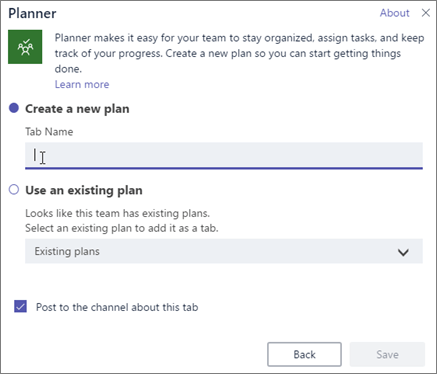
Choose whether to create a new plan or use an existing plan that you have access to as your new tab.
Add Tasks
Enter a task name in the box under the To do bucket, and then choose Add task.
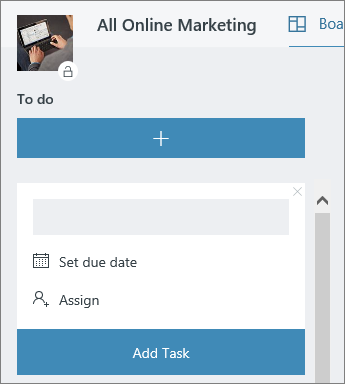
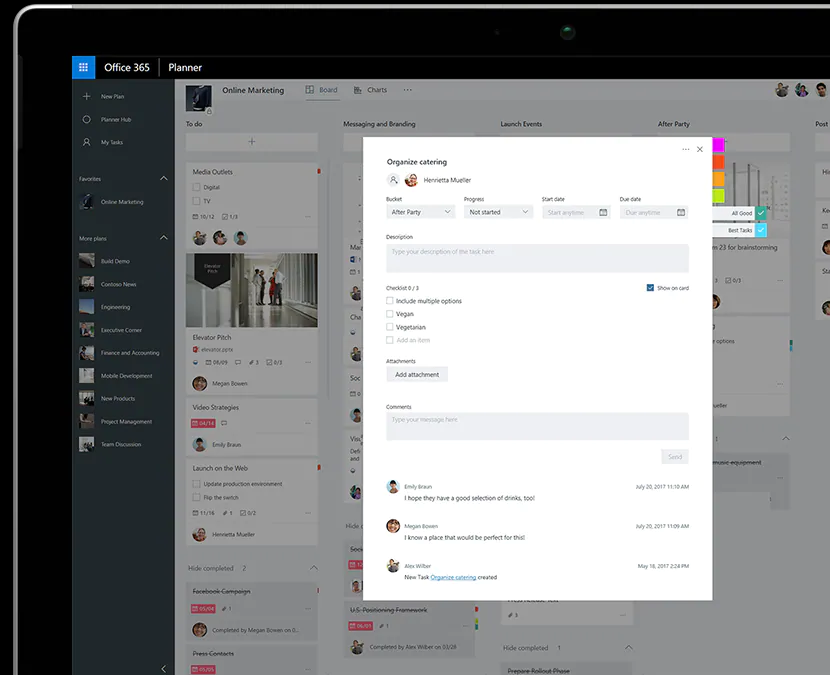
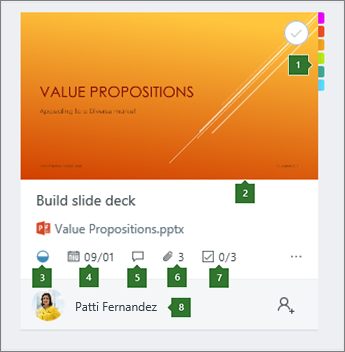
Add details to your tasks like due dates, labels, checklists, attach files and more.
Assign Tasks
You can assign someone to a task when you create it by clicking Assign and choosing a plan member from the list. Select more than one person from your list to assign the task to multiple people. You can assign a task to up to 11 people.

Remove a task assignment by selecting the three dots next to their name and choosing Remove.

Sort Tasks
You can use buckets to break your plan up into phases, departments, types of work, or sections that make the most sense for your plan.
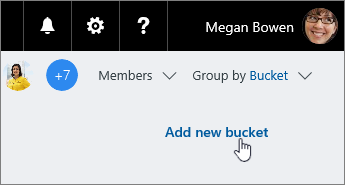
Move tasks into buckets by dragging them to get organized or press the + icon under the bucket name to add tasks directly.
Learn more about creating buckets to sort your tasks >>
Â
Get Working
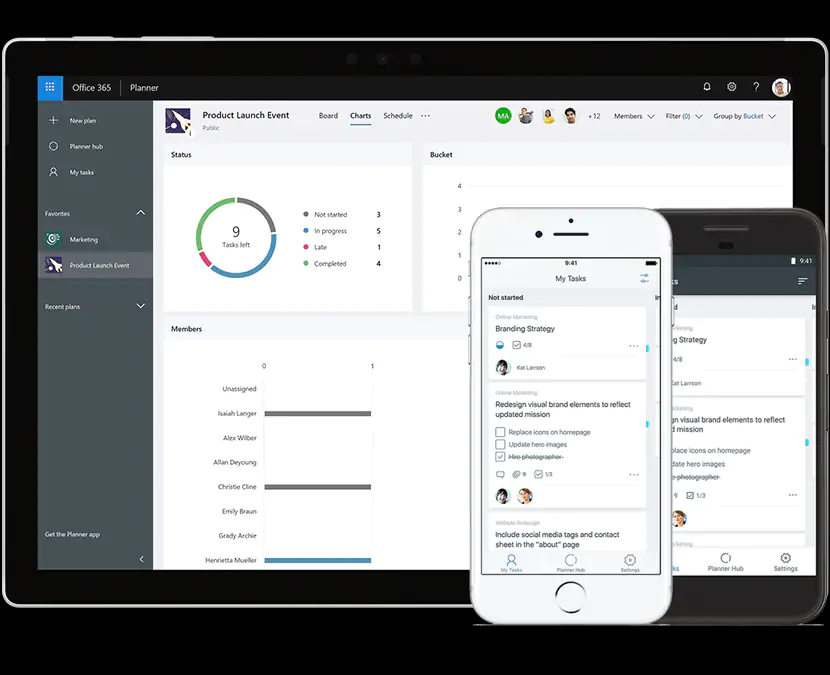
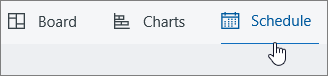
Each Plan has a Board and Chart view to help you visualize your team's progress as you reach your goal.

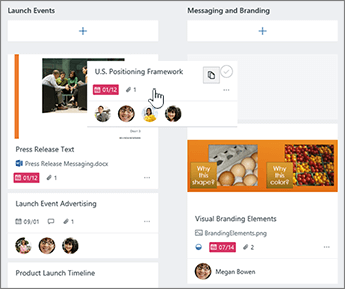
Boards give you a way to organize your team's work and see who's doing what.
Charts show you how your plan is progressing, with information on task statuses.
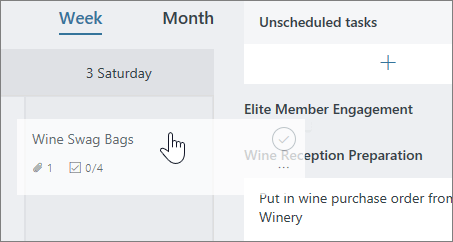
Once your tasks have a start or due date, you'll be able to see them on your Planner calendar using the schedule view.
Tasks without start or due dates can be found in the unscheduled tasks list to the right of the calendar. You can drag and drop them onto the calendar to give them start or due dates.
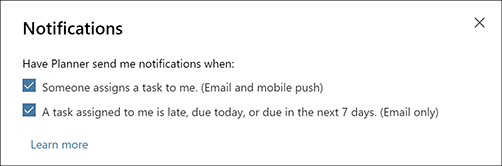
Get email notifications about tasks and due dates by logging into https://tasks.office.com, selecting the settings button at the top right of your Plan and selecting Notifications.
Using Planner and Other Apps
Planner and Outlook
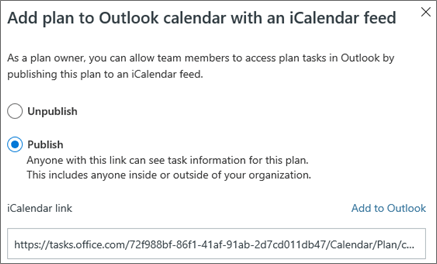
Use the schedule view in Planner to view task start and due dates or add them to your Outlook calendar. To view your Planner calendar in Outlook, the plan owner first adds it to the Outlook calendar with an iCalendar format feed. Then each member can add the plan to their own Outlook calendar.
Publishing iCalendar Feed
- Login to https://tasks.office.com and open the Plan you want to add to your Calendar
- As the plan owner, at the top of your plan, choose the ellipses..., and then select Add plan to Outlook calendar
- In the Add plan to Outlook calendar using an iCalendar feed dialog box, choose Publish. This will automatically publish your plan's schedule information at an iCalendar link
Adding a Plan to Outlook
- At the top of your plan, choose the ellipses..., and then select Add plan to Outlook calendar.

- In Outlook for Web, in the Calendar subscription dialog box, review the link and calendar name, and then at the top of the page choose Save.
- To the left of your calendar, under People's calendars, find the name of your plan's calendar, and select it. You'll see a new tab above your calendar with the plan's name, and you'll see the plan's tasks on the calendar
Planner and Teams
Organize your tasks by adding one or more Planner tabs to a team channel. You can then work on your plan from within Teams or in Planner for web, remove or delete your plan, and get notified in Teams when a task is assigned to you in Planner.
- Open Microsoft Teams and the channel you want to add a Planner tab to
- Click Add a Tab + at the top
- Select Planner from the list
- Choose whether to create a new plan or use an existing plan that you have access to as your new tab.
Find more helpful Planner and Teams tips:
- Add a Planner tab to a team channel
- Work on your plan in Teams
- Open your Teams-created plan in Planner or Teams
- Remove a Planner tab or delete a plan
- Get Planner assignment notifications in Teams
Planner and SharePoint Online
You can add Planner to an existing SharePoint Online page as a web part. With the Planner web part, you can show board or charts and work with your plan right on your SharePoint page.
- Open the SharePoint Online page you want to add the Planner web part to
- If you're not in edit mode already, click Edit at the top right of the page
- Hover your mouse above or below an existing web part or under the title region, click the circled plus sign '+' to add a web part to the page
- Select the Planner web part from the list
|
Check out the latest post from Microsoft or find out about new features. |
||
| Microsoft 365 Blog | Planner Blog | |

Which Tool When?
